Hiking Grand Canyon Rim to Rim Solo
Doing Rim to Rim Solo
If you are thinking to doing the Grand Canyon Rim to Rim and don’t have anyone as crazy as you are to do it with, don’t stop! You can do it solo, just like me. It was intimidating to think about the hike – 24 miles, facing 5000 feet elevation gain, and dealing with the heat in the inner canyon, among other things.
However, I soon realized that a few other adventurous souls were on the trail as well, which was quite a relief. The morning of the tail, I ran into groups of people at the trailhead on the North Rim.
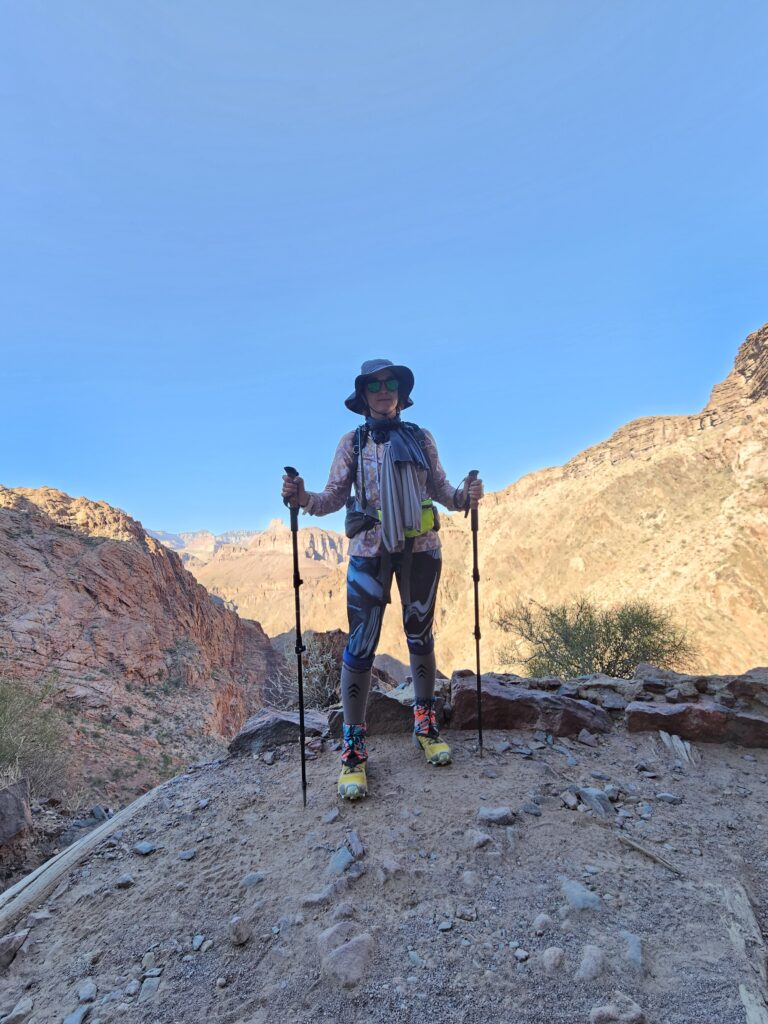
If this hike is on your bucket list and you are afraid to do it solo – don’t! Just start planning your trip and show up. Provided you plan your hike within the open season, you’ll likely encounter other hikers on the trail. The season runs from mid-May to mid-October. I made some trail buddies that I ran into at various points of the hike and it was fun to catch up with them.
Preparing for the Hike
My hike itinerary is below to give an idea. Hike was planned for Saturday.
- Thursday: arrived to Phoenix and picked up a rental
- Thursday (night): stayed at Flagstaff, AZ
- Friday: drove to South Rim to catch the 1:30 PM shuttle to the North Rim.
- Friday (night): stayed at the North Rim Lodge
- Saturday: caught the 6 AM shuttle to the trailhead
- Saturday (night): stayed at the Yavapai Lodge
- Sunday (morning): drove to Phoenix airport to catch my flight back home
As you can see, there is a lot of planning involved, and it can get tricky with hotels at both the South and North Rims often selling out. While I hiked from the North to the South Rim, you can also choose to go the other direction. This choice ultimately depends on your preference; however, I also learned that the climb on the North Rim is longer and has slightly more elevation gain, even though it appeared to be a gradual ascent.
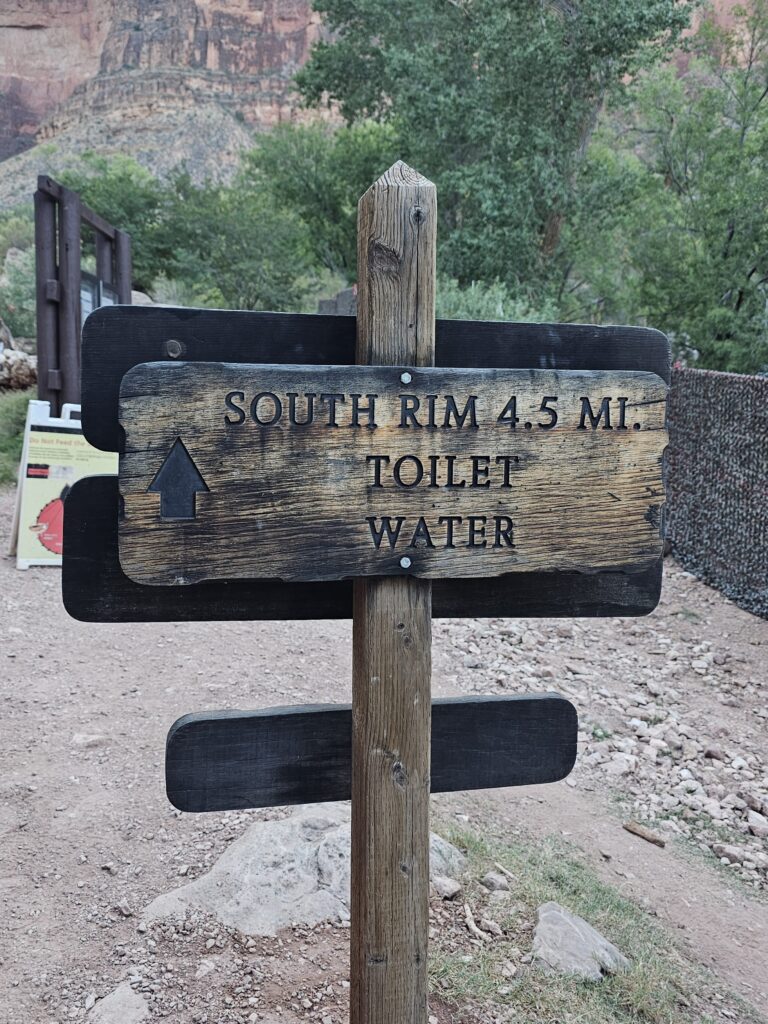
A few more things I learned the day of the hike made me happy I chose to go North to South. First, the South Rim hike has 4.5-mile, 3-mile, and 1.5-mile rest stops (aka rest houses). These stops provide water and offer nice mental breaks while climbing out of the canyon. As a result, you can carry less water on the final climb.
Second, if finishing the climb on the North Rim, you would need a shuttle to the North Rim Lodge or the Kaibab Lodge. North Rim Lodge, which is the closest, is about 45 min walk from the trailhead. Hence, South Rim offers a better options logistically.
Hiking North Rim to South Rim
Accommodations
My preference was to stay at the North Rim Lodge to catch the sunset; however, I ended up missing it because a large group, including myself, was late to the shuttle on the South Rim. On a normal day, you would catch the sunset and it is supposed to be absolutely stunning!
Be sure to book your room at the North Rim Lodge (here is the link) well in advance to secure your date, as it tends to sell out quickly. However, rooms do frequently become available as a result of cancellations or date changes. I was able to move my reservation by checking the website daily. Both North Rim Lodge and Kaibab Lodge offer shuttles to the Kaibab Trailhead on the North Rim, where the trail begins.
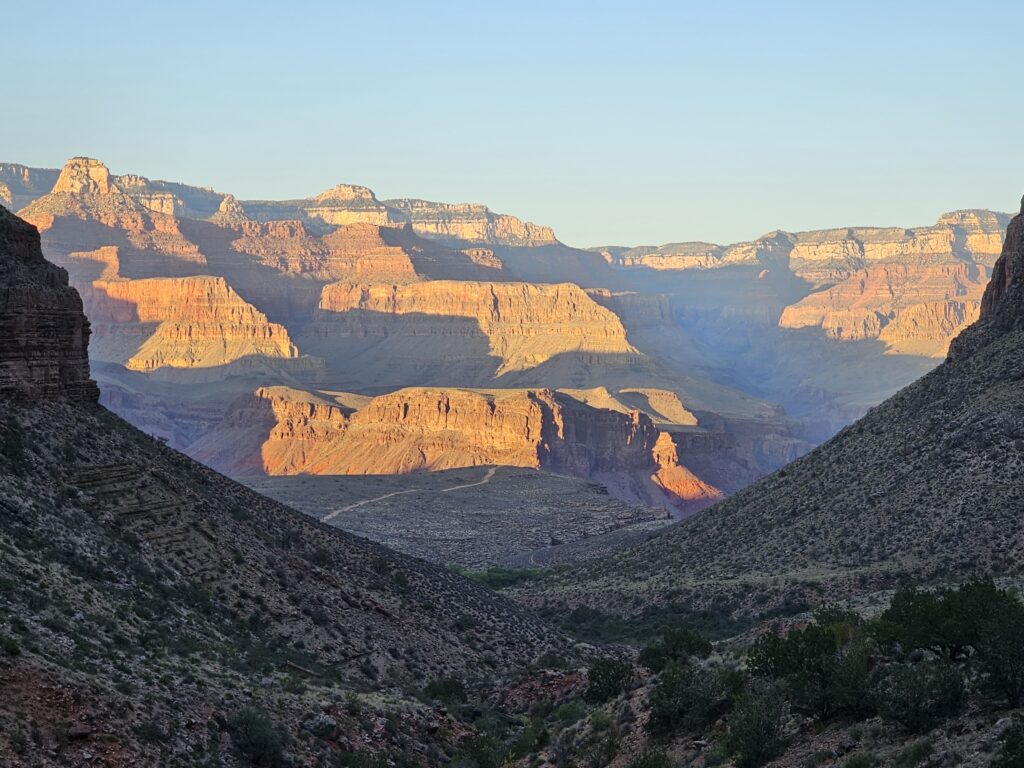
On the South Rim, I would suggest booking the Yavapai Lodge (link here) which was the most affordable and the closest to the Bright Angel Trailhead where the final climb ends on the South Rim. However, you can also consider booking a hotel in Flagstaff, AZ (1.5 hours from South Rim) or Williams, AZ (1 hour from South Rim). Booking at these two locations will be the most affordable and not too far of a drive after the hike. If you read my blog, you know I use Booking.com for my hotel finds. I do find it offer the best pricing and quality.
My hike was on Saturday, and I arrived in Phoenix on Thursday night, picked up a rental and stayed at Flagstaff, AZ that first night. The next day (Friday) I drove to the South Rim to catch the 1:30 PM shuttle to the North Rim. I had a room booked at the North Rim Lodge for Friday night, and on Saturday I caught the 6 AM shuttle to the trailhead.
Trans-Canyon Shuttle
Be sure to book your shuttle from South to North Rim in advance. They do sell out (link here). I managed to booked the last 1:30 PM seat on the shuttle. However, there is also an 8 AM shuttle for the early birds. The shuttle takes about 4.5 hours to get to the North Rim Lodge with a stop at Kaibab Lodge. The shuttle makes two stops. The first stop is at a convenient store where you can buy water, snacks, and use the restrooms. The second stop is primarily for the restrooms.
The pickup location for the shuttle is at the Bright Angel parking lot. Look for a white Ford van with a white trailer in the back and “Trans-Canyon” logo on the side.
Parking at the South Rim
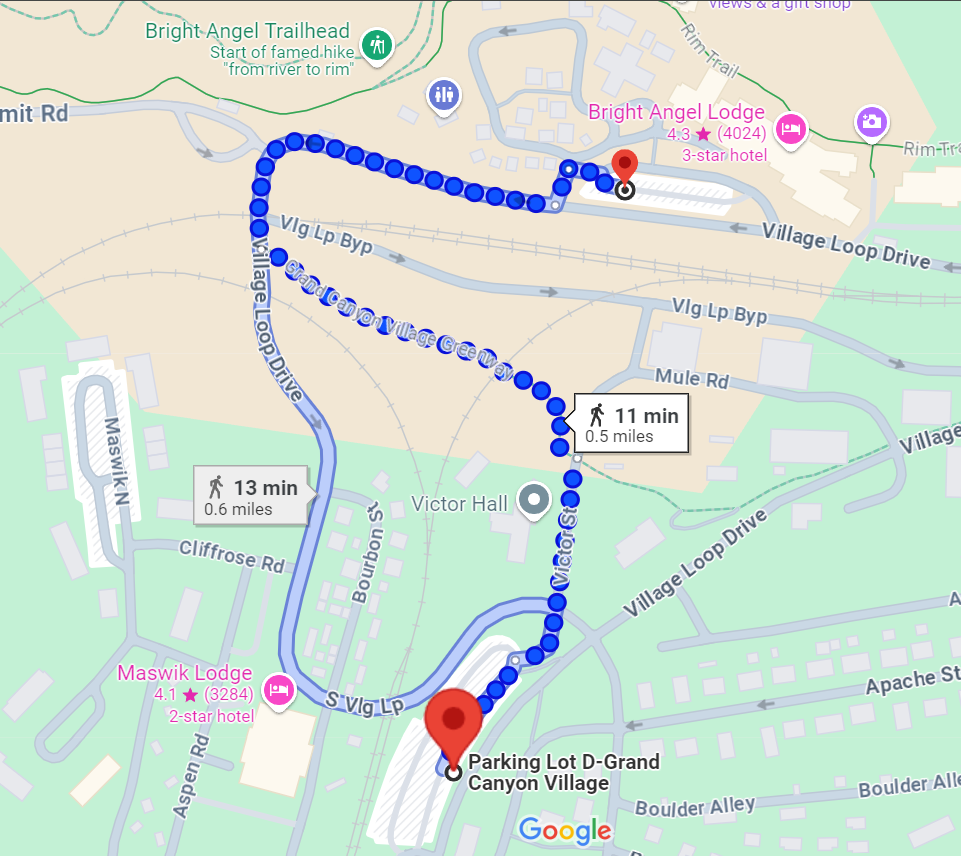
I parked at the Parking Lot D next to the Backcountry Information Center. Overnight parking is allowed at this parking lot and it is a 10 min walk from the shuttle pickup location at the Bright Angel Trailhead parking lot. You may be able to find parking at that pickup location as well. However, it gets busy mid-afternoon as majority of visitors that come to the park, choose this parking lot.
Gear for the Hike
Packing for the hike requires a strategic approach; after all, the goal is to be as light as possible while having everything you need.
I brought my favorite backpack – Gregory Jade 28L S/XS – as it proved itself and I love it! I was wearing all my gear that I would wear the day of the hike to not carry any extra clothes. The exception to this was an extra T-shirt for the night and a windbreaker for the North Rim as it is colder there.
I must admit that I could have left out the windbreaker because I spent little time outside the night before the hike. On the morning of the hike, the temperature was in the low 40s. However, I warmed up quickly once I started hiking.
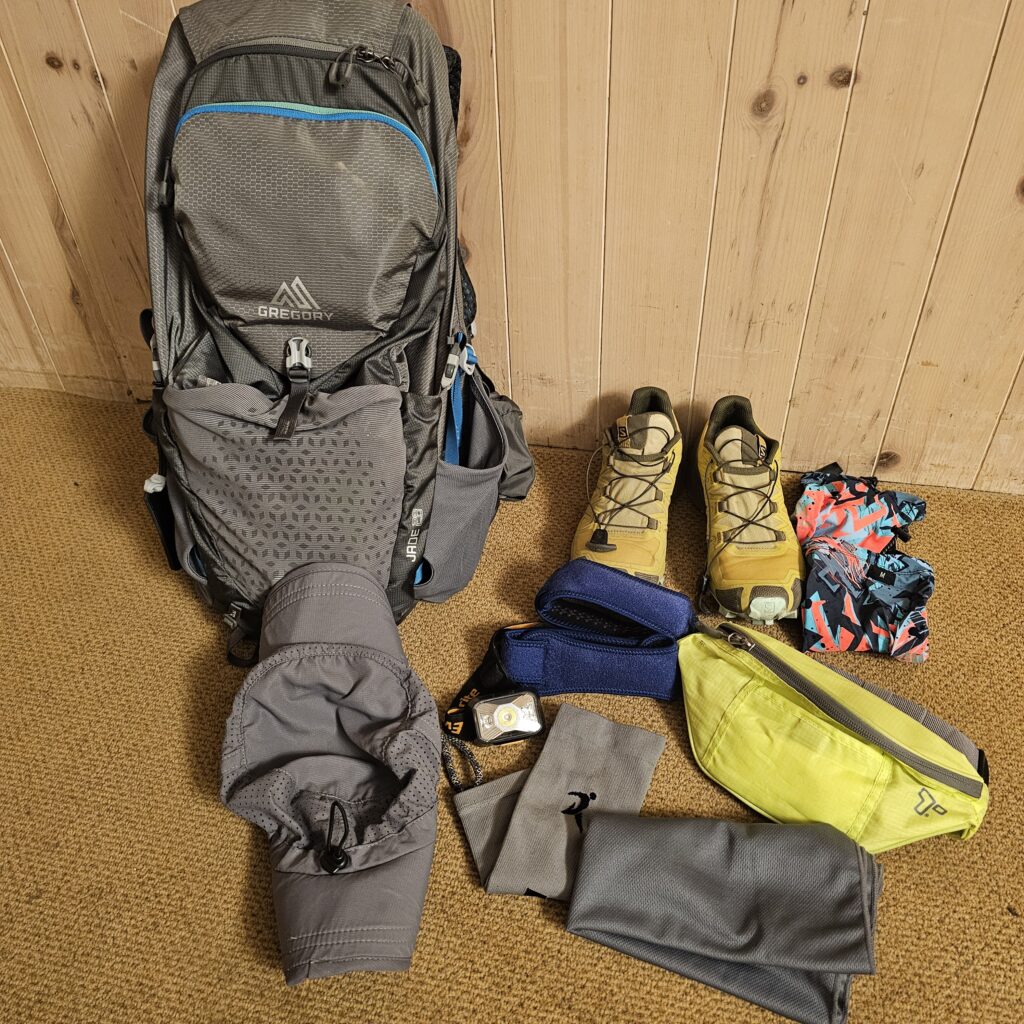
I used my Salomon Speedcross 5 trail shoes and custom insole inserts from Superfeet FLEXThin Dynamic Comfort that worked perfectly! Majority of hikers were wearing shorts, however, I prefer compression pants to avoid skin to skin friction as well as help the muscles with added compression.
In my research, I learned that bringing a long-sleeve moisture-wicking shirt was a great idea, and it worked out perfectly for me. Additionally, I packed two cooling towels that I found on Amazon, which also performed exceptionally well. I’ll share more tips on how I used them later.
Needless to say that you will need a hat, glasses, headlamp, and trekking poles, of course! I also used a fanny pack for my phone and lip balm for a quick and easy access, since I was taking pictures on the go. Among other gear, I use calf sleeves and knee straps on long hikes, and got tail gaiters for this hike. This is to prevent injuries. For this hike, I also packed three extra pairs of socks and taped all my toes with Leukotape and both my knees with a KT Tape. Although, I think I could have skipped the KT Tape. I got blisters from having the knee straps over the KT Tape.
Always have a first aid kit with extra tape, pain killers, Band-Aid, gauze. I bought the Johnson & Johnson first aid kit at the dollar store that I pack with additional supplies. There is always someone on the trail that may need help, and just good practice to have this handy.
Food for the Hike
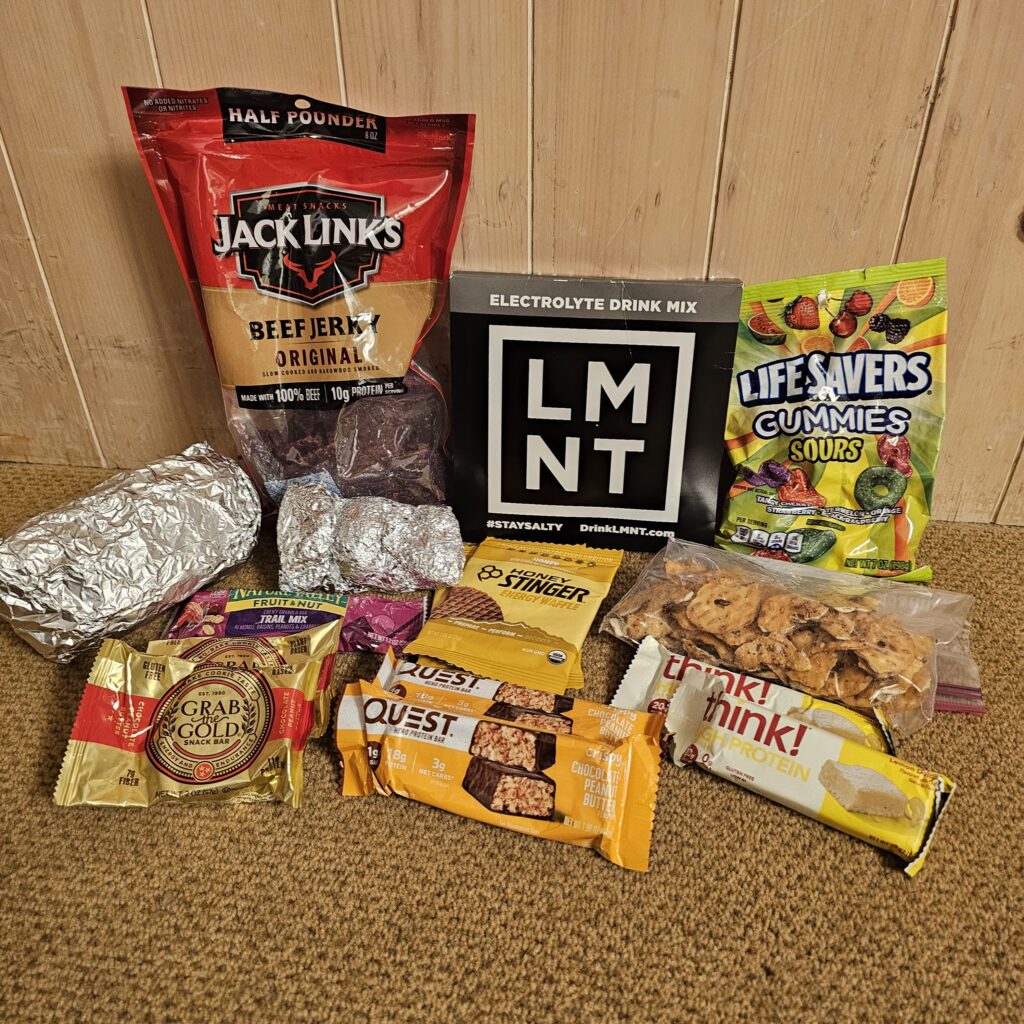
I thought I packed light with food, but I could have definitely packed even lighter. There is also food for purchase at the Phantom Ranch, which can help with weight. Below is what I carried on me.
- 4L of water at the start (see tips below)
- two protein bars (didn’t use)
- 2x energy bars (used both)
- 2x Grab the Gold snacks (didn’t use)
- 3x Honey Stinger waffles (used one)
- 1x granola bars (used it)
- an apple (used it)
- 1x sandwich (used it)
- a bag of beef jerky (used a small amount)
- a bag of sour candy (used a small amount)
- a ziplock bag of salty crackers (used a small amount)
- one Honey Stinger chews (used it)
- four dates (didn’t use)
- LMNT electrolytes (used 3 or 4 packs)
You should also think about the food before the hike. I would suggest getting dinner at the North Rim. There are a couple of spots that offered decent food options such as a pizza place, cafe with sandwiches and salads, as well as the main dining room. The main room serves breakfast, lunch, and dinner, but requires reservations and will likely be the pricier option.
The Day of the Hike
Water Supply and Strategy
I started the hike at around 6:15 am and the first 6 mi to the first rest stop at the Manzanita Rest Area is all downhill. The sunrise provided absolutely stunning views and I am glad I started later than others. Manzanita Rest Area has restrooms and water. I would suggest starting with 2L of water to keep the pack light vs 4L as I had at the start.
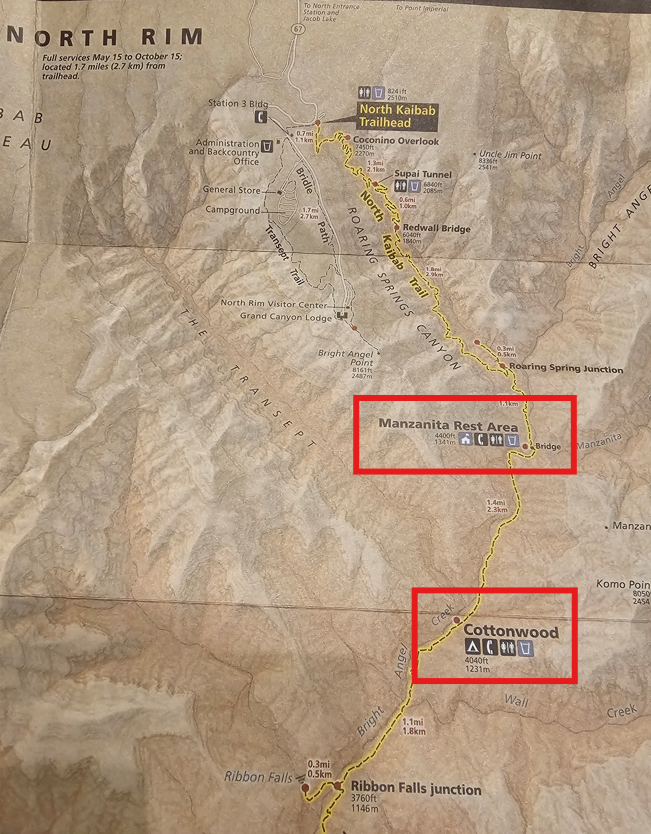
You can make a quick stop at Manzanita Rest Area to use the restroom and fill up water if needed. The other option is to completely skip this stop and continue to the Cottonwood rest area. It is located about 1.5 mi from the Manzanita Rest Area and would have less people in line for the restrooms. Cottonwood would be your last water refill and restroom opportunity, however, until you reach the Phantom Ranch which is about 9 mi out from that point.
I would suggest getting 3-4L of water at Manzanita or Cottonwood because the hike to Phantom Ranch will get hot and you will notice using more water in this part of the hike. The good news is that this part of the hike is mostly flat. Hence, carrying that much water shouldn’t weigh you down that much.
I would also highly recommend drenching your long sleeve shirt in water at the Cottonwood rest stop. It will help keep you cool as you are navigating through the inner canyon. I wish I knew this trick as it would really help me. I only got to do this at the Phantom Ranch when suggested by the ranger.
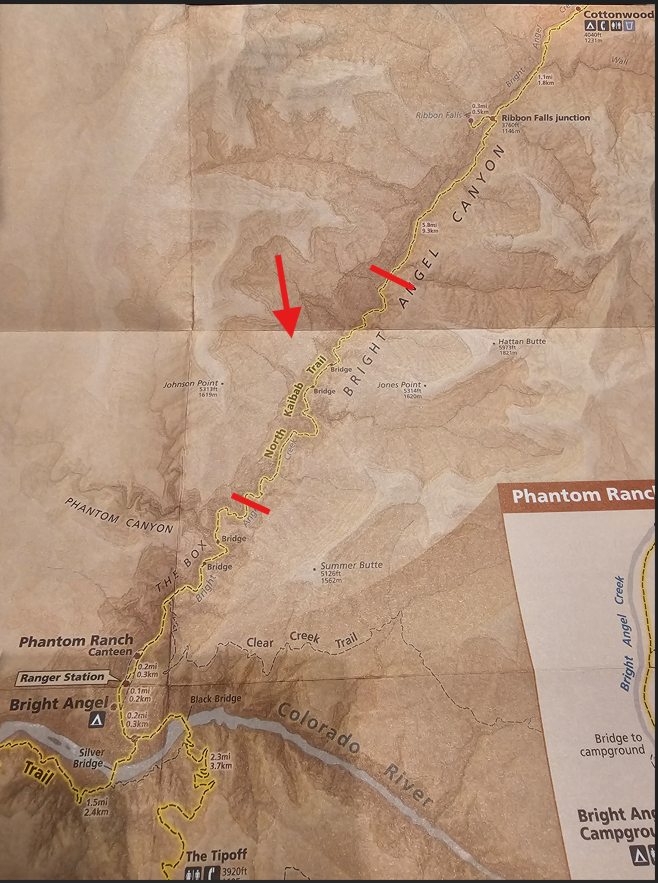
If you start at 6 am, you will reach the hottest part of the inner canyon (marked stretch on the map) at around 10:30 or 11 am. It shouldn’t be that bad if you are doing the hike at the start or the end of the season. I would not recommend doing this hike in summer as I can see it can getting really hot.
My advice is to get through the hot parts of the hike as quickly as possible. There will be plenty of shaded areas where you can slow down the pace and take breaks.
Break Strategies
I did not make a lot of breaks until I got to the Phantom Ranch. Only a quick bio break at the Manzanita Rest Area and continued on by snacking on the way. I took no breaks between Manzanita and the Phantom Ranch, except for taking pictures. However, you should listen to your body and take as many breaks as you need. I was fueling on the go to not lose the momentum.
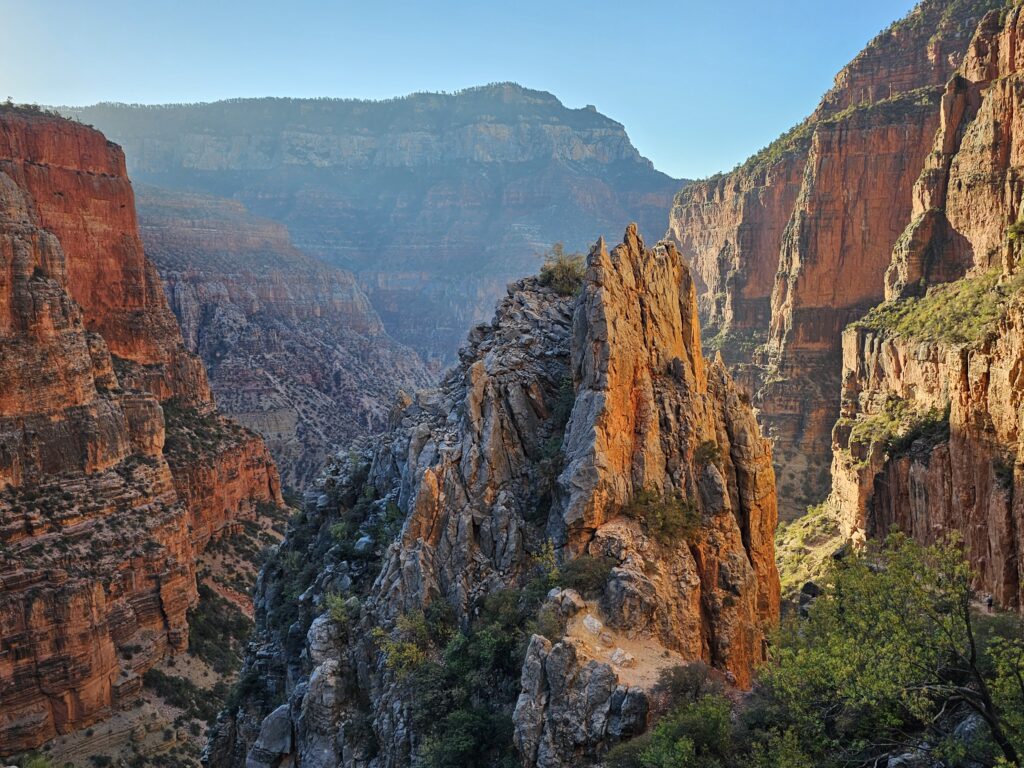
When I reached the Phantom Ranch, I was planning to take a max 45 min break but ended up taking a 1.5 hr break as I was chatting with my trail buddies. I also realized that starting at 6 am was a great strategy, as I ran into the groups at the Phantom Ranch that started the hike at 3 and 4 am respectively. If you start at 3-4 am, the final climb to the South Rim will all be under the sun and heat, increasing the chances of heat stroke or exhaustion. This may force you to take a longer break at the Phantom Ranch if you start that early.
If you start around 5-6 am, you can take 45 min to 1 hr break at the Phantom Ranch and the final climb will be mostly shaded. You may even finish in the dark, just like me. It will depend on your pace. I personally would rather deal with the heat as I’m going through the flat part of the hike than during the steep climb.
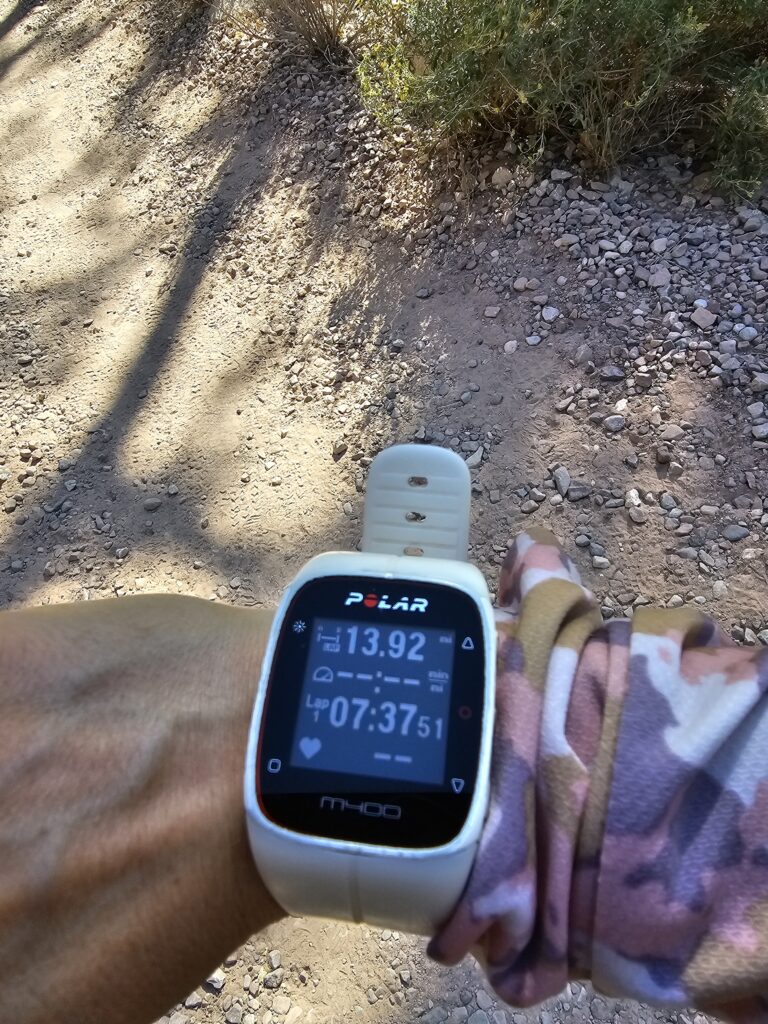
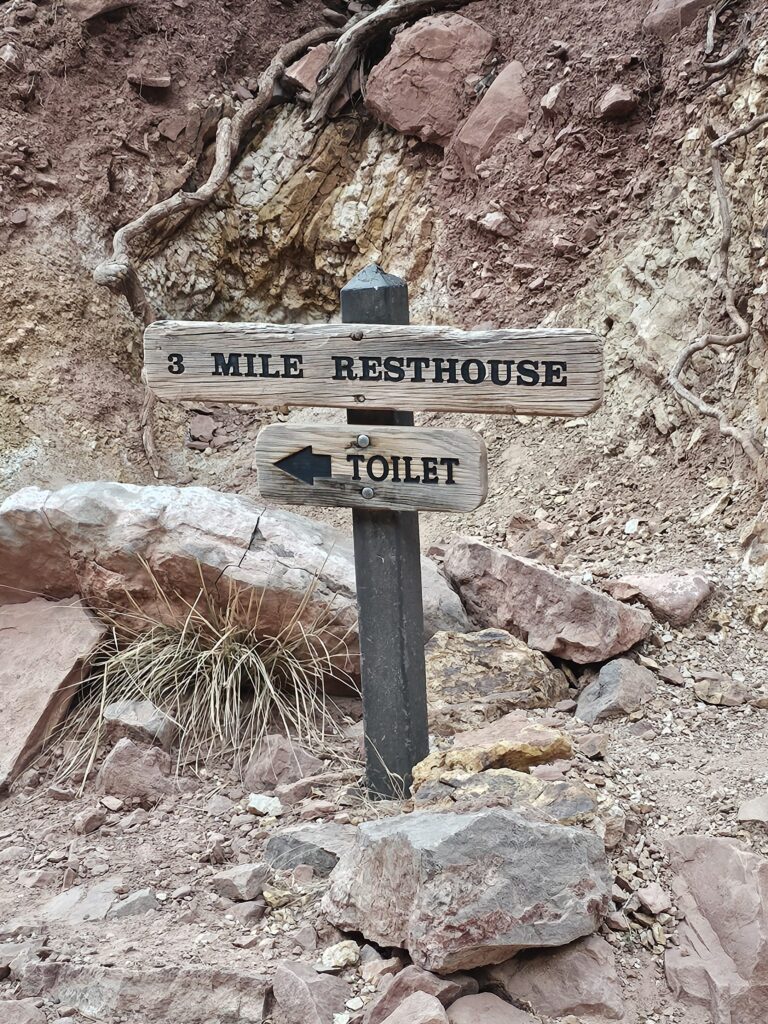
I left the Phantom Ranch at the 7:37 hr mark. My pace was slow up to 4.5 mi rest stop. There is a restroom about 1.5 mi out from the Phantom Ranch, and then the next one is at the 4.5 mi rest stop. I took about a 15 min break here and on my way to the 3 mi resthouse to fuel and rest my feet.
I didn’t take much of a break at the 3 mi resthouse, however; only to wet my shirt. I also increased my pace on my way to the 1.5 mi resthouse. I took a 10 min break at the 1.5 mi point and continued the climb very slowly. The last 1.5 mi climb seemed the steepest and I would take a few steps and stop, which worked well for me. It took me about 2 hrs to complete the final 3 mi climb.
Cooling Strategies
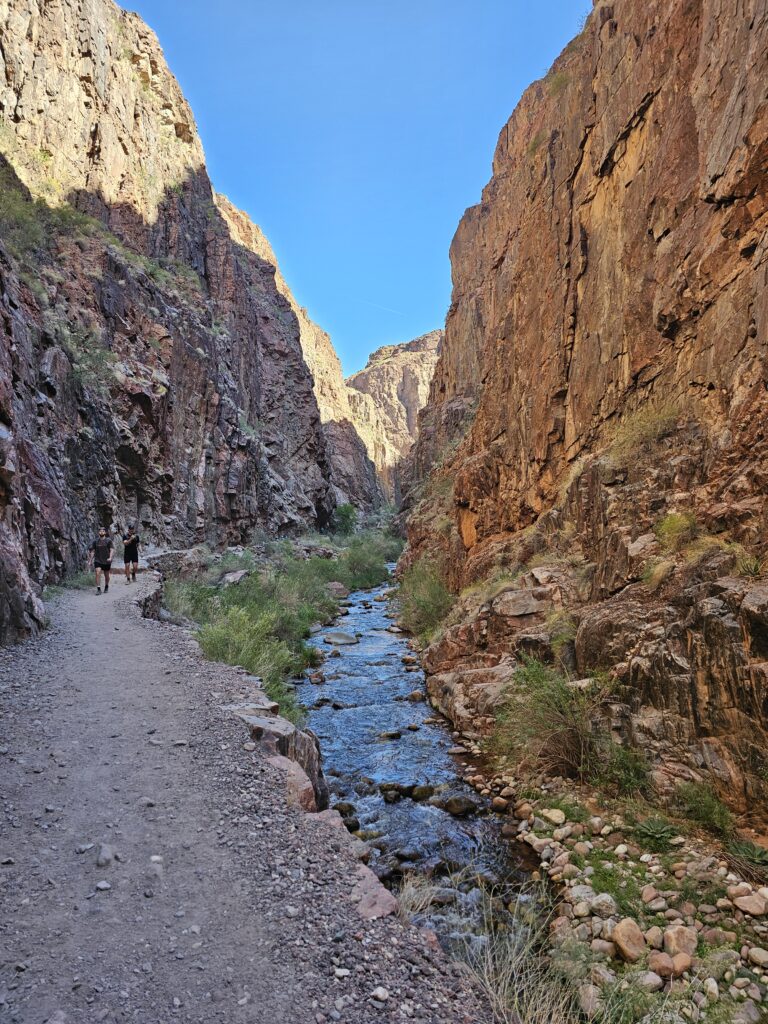
Half-way to Phantom Ranch, you will hit a creek / river with access points, and I would encourage you to take the opportunity and drench your top at those points, as well as your cooling towel.
As noted earlier, I would recommend drenching the long sleeve top at the Manzanita or Cottonwood Rest Areas and throughout the hike. It will keep you cool and will really help with the overall experience during the hike. I wish I knew this as I could see how much better it would have been.
At the Phantom Ranch you can buy a 10lb bag of ice – please do it! I filled up my camelbak with a lot of ice and some water, instead of filling it up all with water. Ice is lighter and eventually it will melt into water, so it can be a good weight management strategy. I also carried a 1L water bottle which I would fill up at the Phantom Ranch. It was my primary water source with electrolytes.
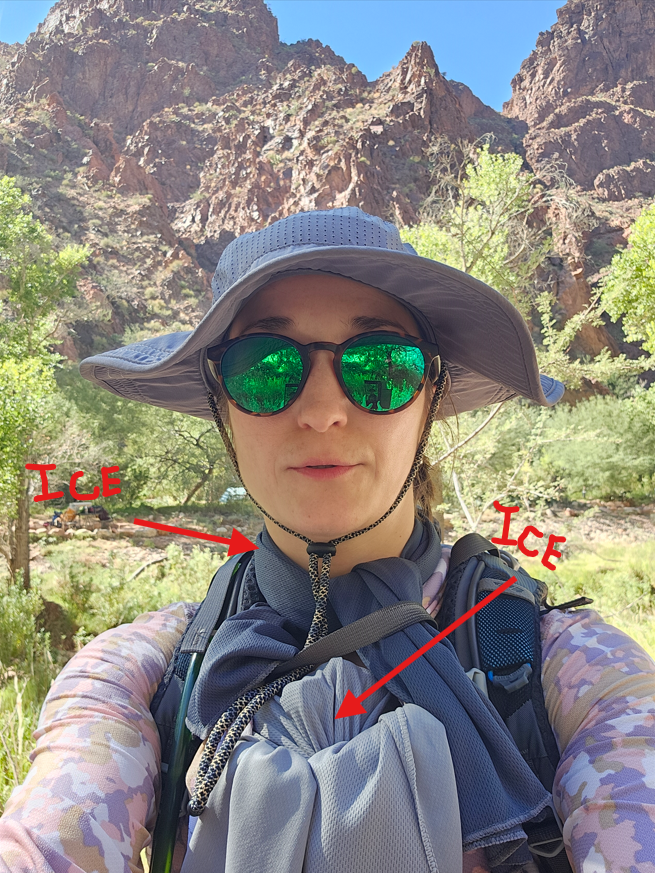
I had two cooling towels that I used to make ice packs. I put one of the ice packs behind my neck and tied the ends of the towel around my neck, and the other ice pack went right under my shirt and onto my chest.
These ice packs lasted me a LONG time and kept me cool on the final climb. When all the ice all melted, I would wet the cooling towels at the water stations or the creeks and would wrap them around my head and neck. Even when the sun is down, you will feel warm as you will exert a lot of energy when climbing up and your body will naturally warm up, so this strategy will keep you cooler.
I would also recommend getting a lemonade at the Phantom Ranch cafe and then getting a $1 refill. This will really cool you down and give you energy (all that sugar!!) as you continue to the final climb.
Electrolytes
This is absolutely a must! Don’t just drink water as it flushes out the minerals from your body and may lead to cramping later. I had seen a few people cramping on the final climb. Refill the minerals by adding electrolytes to your water. I used my 1L water bottle to mix the LMNT electrolytes. I haven’t tried any other brand of electrolytes, but I’m sure they are all equally good and will do the job!
Trekking Poles to Boost Speed
I noticed that a lot of people didn’t have trekking poles on them or didn’t use them properly. This magic gear can really boost your speed and save your knees. I absolutely recommend having them for the downhill, the flats, and the climb. If used properly, they make such a HUGE difference.
I highly recommend watching some videos on YouTube on how to use trekking poles. I didn’t know how to use them when I first got them for my Half Dome hike and watching YouTube videos, particularly this one, really helped. They also make a huge difference during this hike as well.
Here are the links to the gear I had in case you are interested. I was pretty happy with everything I got for this hike. It was spot on from a gear perspective!
- Gregory Jade 28L backpack
- Salomon Speedcross 5 Trail Shoes
- Superfeet FLEXThin Dynamic Comfort insoles
- Trail Gaiters
- Cooling Towels
- Knee Straps
- Calf Sleeves
- Trekking Poles
- Headlamp
- Windbreaker
This covers it for me. If you have any questions, feel free to send me a note at theaisleseatlife@gmail.com.
If interested in more content like this and need inspiration, read my blog on the Half Dome Cables in Yosemite. Another great adventure!
